Written by
How To Ebonize Paper Mache (Celluclay)


Written by
Category
Release Date
I’ve been working with paper mache clay (cellu – clay) for the last decade and a half. I’ve always been interested in how to make new shapes, figure out new sculpting methods and tools, but as far as the coloring of the medium afterwards, I’ve only tried a small handful of treatments. My most widely used medium has been acrylic paint, because it’s hard wearing, colorfast, easy to use, widely available and not expensive. In recent years though – by accident or through study of other mediums – I have found a few other ways to add color or texture to my pieces. I will be covering one of them in this blog post, which is called “ebonization” by the woodworking community.

In order to try this yourself, you only need a few basic household items.
First, we will prepare the iron acetate solution. This is as simple as filling a medium glass jar halfway with distilled vinegar, and popping in a steel wool pad. Loosely affix the lid and put it in a dry place for a week (the lid must not be air tight, this chemical reaction requires oxygen!). In a week’s time, the vinegar should have eaten a good amount of the steel wool, and the solution should be a murky blackish brown. Put this to the side as we prepare our tea solution.

With a pot filled with a few cups of filtered water, add several large tea bags and set it on the stove to boil. You want to boil the devil out of these tea bags. If the water goes too low, add in another cup or so and keep boiling. when it reduces again and is looking extremely dark, like coffee, turn off the heat and let cool down. When things are cool enough to handle, pour off your reduced tea concentrate into your second jar. Maker sure to then wring out the tea bags into the pot and pour this last share in as well, you want every ounce of tannins that you can muster.
Now, the fun begins! I have 3 slightly different examples I’m working with today – one is a paper mache clay head that I baked to harden and left un-sanded. The second one is air dried, and sanded in some places, and therefore is a brilliant white. The third piece is a skull shape that was baked but then covered with joint compound, making it white. For ease of convenience, I will refer to them as Betty, Robert and Sybil.
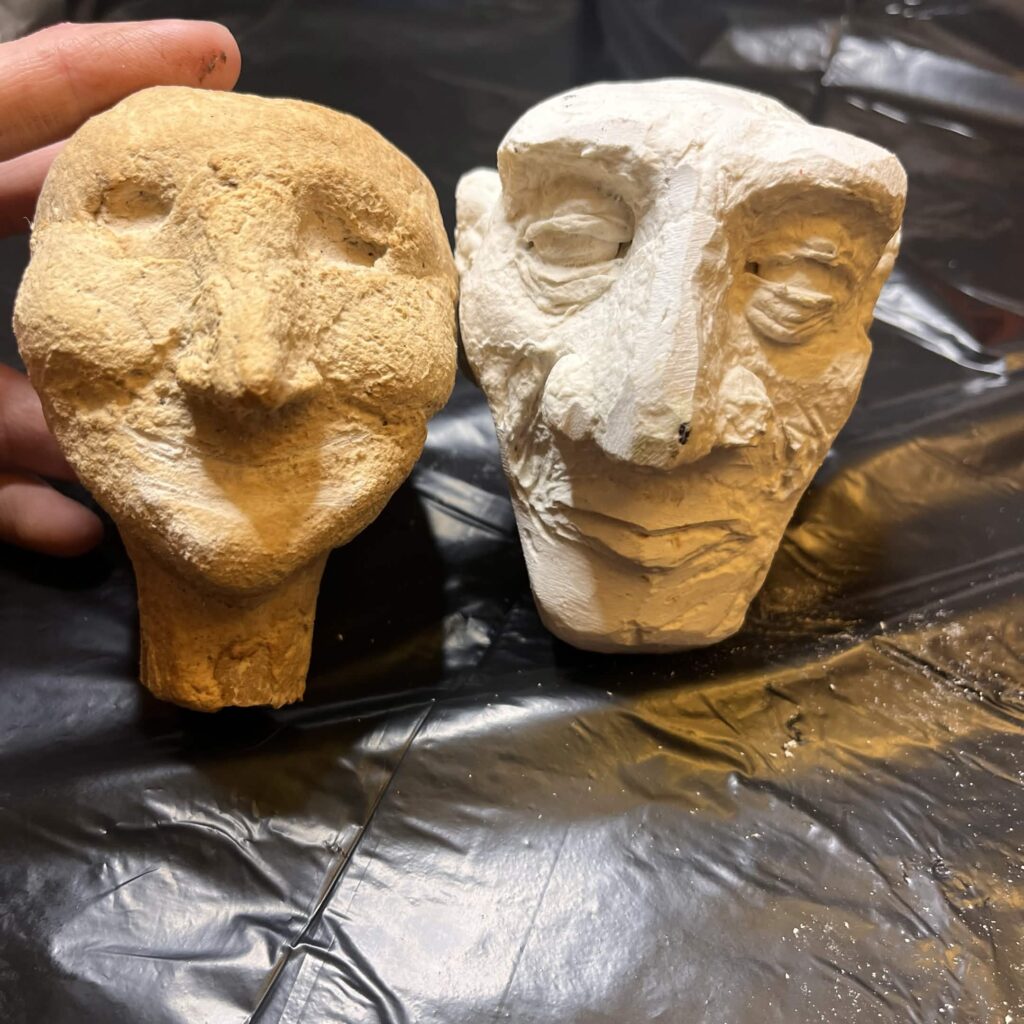
Betty and Rob.
To start, shake up your tea solution, and paint it vigorously over every square inch of your paper mache piece. (if you want to, you can mask certain parts or leave some parts unstained, this leads to a beautiful effect!) Right when you are done, place the piece in front of a fan, or somewhere with a breeze/sun, to dry. When the first layer is dried, paint on a second layer of the tea and let it dry again. The reason why I try to dry it a bit fast is twofold: it makes it so you can paint the second layer on quicker, and it makes it so that the piece doesn’t get too saturated and potentially deform. You can paint a third layer on if you’d like, but I think 2 does just fine.


Work quickly, and cover every square inch.
Here’s where the magic really happens. With your dried, tannin infused paper mache piece in hand, paint over the vinegar/iron mixture and watch the color shift from beige to brown to black before your eyes.

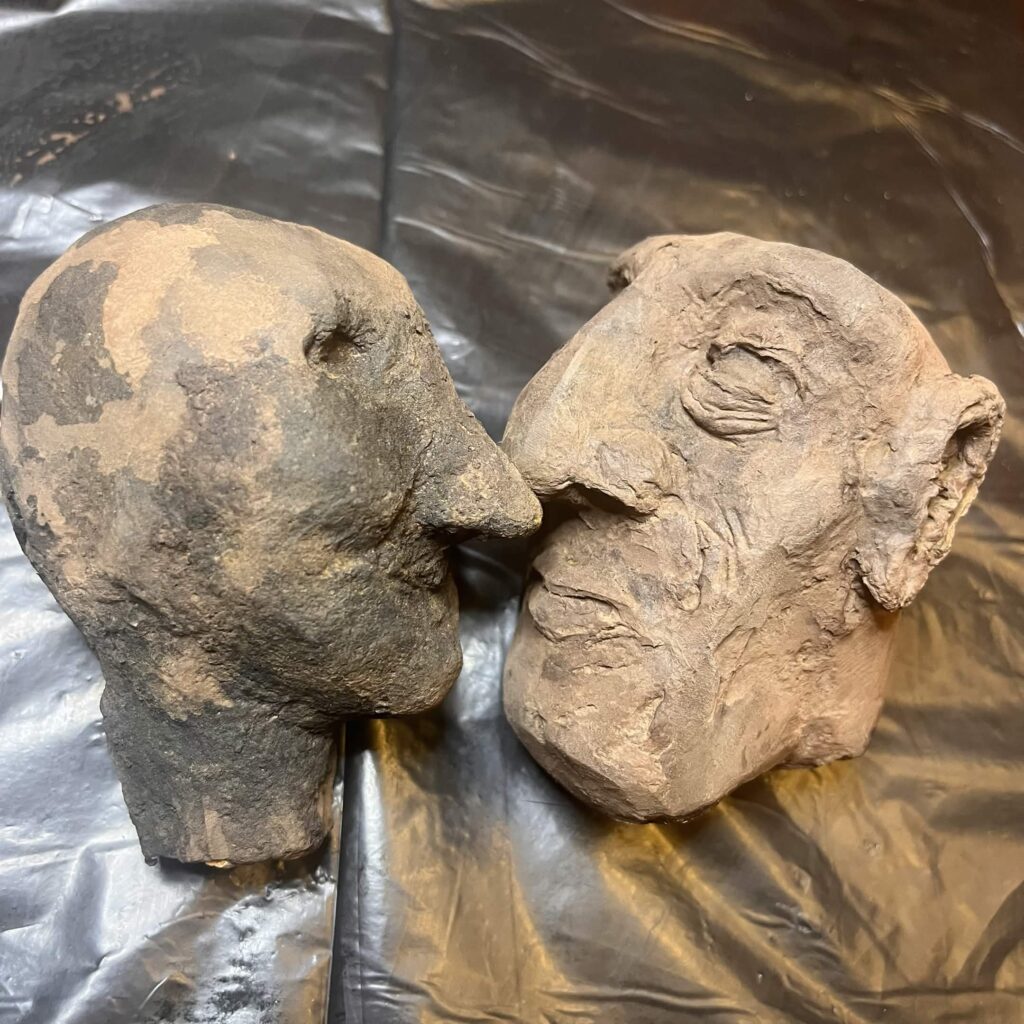
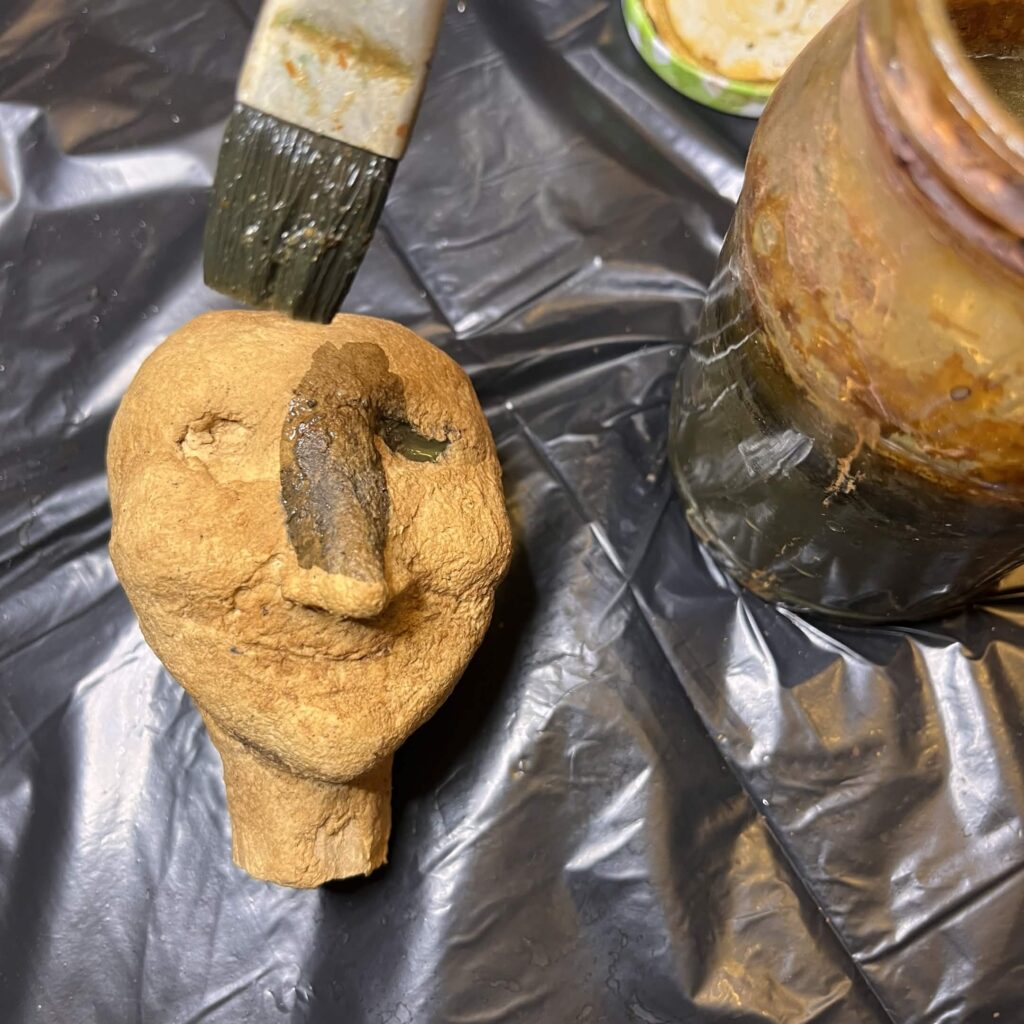
If it’s still a bit light for your liking, you can wait for it to dry and then paint on another layer of the iron acetate. You can even paint on the tea mixture, wait for it to dry, and paint on the vinegar again, doing a whole other cycle. This is helpful if you want an extremely black item. Experiment and see what works for you.
When the ebonizing process is done, you’ve got several ways to enhance its appearance. For example, with Robert, I painted his eyes a ghostly white. With Sybil, I dry-brushed using the same white paint, which gives quite a favorable effect. You can also sand away the areas you’d like to be lightened, something that I have yet to explore fully. One thing I was considering was using a dremel to carve in a design after the ebonization process. The sky is the limit!
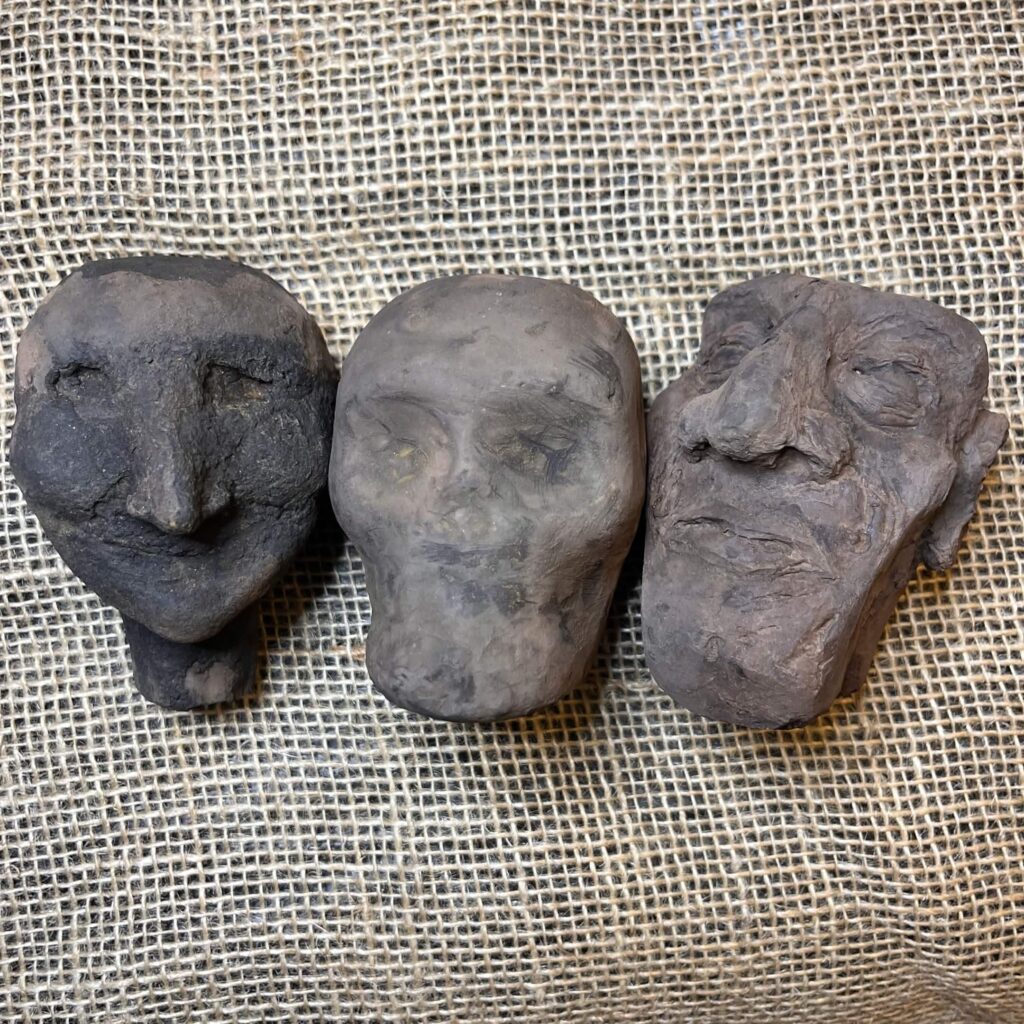
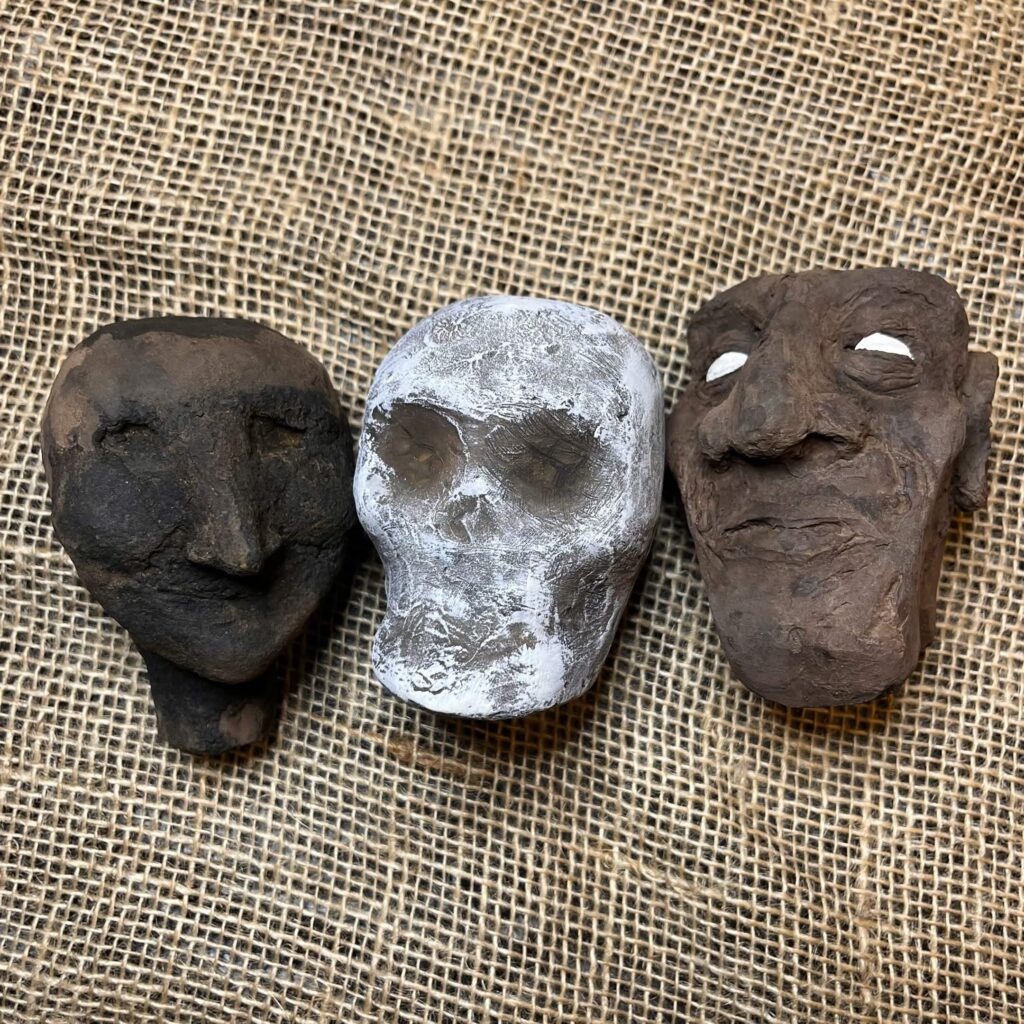
The whole spooky gang. Betty will have eyes soon, I promise!
Ever since I learned about this process, I’ve been thinking of different ways to apply it to different porous mediums. I have done so with wood and plaster as well, with varying results. I have found that the best spray sealant to use is either a clear acrylic spray, or a water based polyurethane spray. Solvent based sprays may lift up the coloring and lead to uneven finishes, but if you’re trying to do something funky, give it a shot! Play and experimentation are so incredibly important. The idea of making something that is truly unique by happenstance is one of the greatest joys in life. But enough of my tangents – if you ever would like to use this method and have any questions, feel free to shoot me a message!